Tuesday, 1 December 2015

Queijadas de Ricotta | Recipe


In Portuguese

 Se há coisa que eu gosto é chegar do laboratório e continuar as minhas "experiências" mas, desta vez, na cozinha!!

Ontem sairam umas queijadinhas de ricotta. E que maravilha que ficaram!

Para 12 queijadinhas:

Ingredientes
  • 1 caneca de leite (+/- 250 ml)
  • 250g de queijo fresco (usei Ricotta)
  • 3 colheres de sopa de açúcar
  • 30g de manteiga
  • 1 ovo
  • 2 colheres de sopa de farinha (usei Doves Farm Self Raising)
  • Raspa de um limão

Preparação 
  •  Colocar o queijo num recipiente e mexer durante uns segundos;
  • Adicionar a manteiga previamente amolecida, o ovo, o açúcar e a raspa de limão. Bater durantes uns minutos;
  •  Adicionar o leite e a farinha e bater durante mais alguns minutos até a mistura ficar homogénea;
  • Deitar o preparado em forminhas e levar ao forno pré-aquecido a 180ºC  durante cerca de +/- 35 minutos.

In English 

If there's something I really like is coming back from the lab and continue my "experiements" but, this time, in the kitchen!!

Yesterday I've tried a Portuguese recipe of cupcakes (don't know if this is a correct name for these "little" cakes - Queijadas (Just for you to learn a bit more, the principal ingredient is cheese and in Portuguese it is called "Queijo" that's why they are named Queijadas. :) )

Ingredients 
  •  1 mug of milk (+/- 250 ml)
  •  250g of Ricotta
  • 3 soup spoons of sugar
  • 30g of butter
  • 1 egg
  • 2 soup spoons of flour (Doves Farm Self Raising)
  • Zest from 1 lemon
Method
  •  Add the cheese in a recipient and stir for a bit;
  •  Add the butter slightly melted, the egg, the sugar and the lemon zest. Stir well;
  • Add the milk and the flour and stir again very well;
  • Place the dough into little forms and put it into the preheated oven at 180ºC  for +/- 35 minutes.


Wednesday, 25 November 2015

Orange cake | Recipe


In Portuguese

Aqui fica a receita de um bolinho de laranja, super simples e delicioso!! =D


Ingredientes
  • 6 ovos
  • 1.5 caneca de farinha (Doves Farm Self Raising)
  • 1.5 caneca de açúcar
  • 0.5 caneca de óleo
  • Sumo de 2 laranjas 
  • Raspa de 1 laranja
  • 2 colheres de chá de fermento
  • 1 colher de chá de canela em pó
  • Calda de laranja: Sumo de 2 laranjas + 2 colheres de sopa de açúcar
Preparação
  • Bater bem as gemas dos ovos com o açúcar, canela e o sumo de laranja até ficar cremoso;
  • Juntar o óleo e bater de novo até ficar bem incorporado;
  •  Juntar a raspa de laranja, a farinha e o fermento. Mexer bem até a massa começar a formar bolhinhas
  • Bater as claras em castelo e adicionar à mistura. NOTA: Envolver apenas, não bater!
  •  Untar a forma com manteiga e porvilhar com farinha;
  • Levar ao forno pré-aquecido a 180ºC durante +/- 40 minutos.
  • Depois de cozido preparar a calda de laranja. Juntar ao sumo das laranjas o açúcar e levar ao fogão. Deixar levantar fervura durante 1 - 2 minutos.
  • Furar o bolo com um garfo e adicionar a calda.
  •  
In English

Here it is the recipe of an orange cake, super simple and soooo delicious!!!!

Ingredients:

  • 6 eggs
  • 1.5 mug of flour (Doves Farm Self Raising)
  • 1.5 mug of sugar
  • 0.5 mug of sunflower oil
  • Juice from 2 oranges
  • Zest from 1orange
  • 1 dessert spoon of cinnamon powder
  • 1 dstspn of baking powder
  • Orange syrup: Juice from 2 oranges and 2 soup spoons of sugar

Method:
  1. Add the sugar, then the cinnamon, egg yolks and stir very well until it gets creamy;
  2.  Add the sunflower oil and mix it very well;
  3. Add the orange zest, the flour and the baking powder. Mix very well until the dough starts forming bubbles;
  4. Whisk the egg whites and add it. NOTE: Mix it very gently!!
  5.  Grease the cake form with butter and sprinkle it with flour;
  6.  Add the dough into the cake form and put it into the preheated oven at 180ºC  for +/- 40 minutes (the duration depends on the ovens - always have a look!! ;) )
  7. After that, prepare the orange syrup. Mix the orange juice with the sugar and let it boil for 1-2 minutes.
  8. Pierce the cake with the help of a fork and add the orange syrup. 

Sunday, 18 October 2015

Recipe | Bread


In Portuguese

 Ontem foi dia de experimentar mais uma mistura de farinhas e decidi fazer pão.

Ao longo de todo este processo de adaptação à dieta isenta de glúten, o que tem sido mais dificil para mim sem dúvida alguma é a questão de pão... 

A textura exterior ficou muito boa, mas a interior ainda tem de ser um pouco melhorada, na minha opinião. De qualquer forma este pão faz uma torradas muito boas!! :) E pode ser também utilizado para cozinhados que exigem pão ralado ou até mesmo algumas sobremesas de Natal (que não tarda está aí!!).


Aqui fica então a receita:

  1. Colocar os ingredientes pela ordem indicada na forma da máquina;
  2. Escolher o programa 9 (no caso de a máquina ser da marca Silvercrest - de vez em quando está à venda no Lidl);
  3. Caso goste que o pão fique mais tostadinho por fora, escolher o peso de 1250g e a opção de cor mais escura).

Ingredientes
  •  450 ml de água
  • 1,5 colheres de chá de azeite
  • 600 g de mistura de farinha para pão (neste caso usei a "All purpose baking flour" da marca Bob's Red Mill
  • 1.5 colheres de chá de sal
  • 1.5 colheres de chá de fermento (usei o Quick Yeast da Doves Farm)
  • PS: muitas receitas para pão isento de glúten incluem açúcar. Eu decidi não colocar. Talvez o sabor fosse favorecido, mas neste caso preferi escolher a versão mais saudável. 
Quaisquer sugestões para melhorar a receita são mais que bem-vindas!! =D


In English

 Yesterday I decided to try another mixture of flours and I baked bread.

During all this process of adaptation to a gluten free diet what it's been more difficult to me, undoubtedly,  is the question of the bread...

The outside texture was really good, but the inside one, in my opinion, still needs some improvements. Anyways, you can make really good toasts using this bread!! :) And it can also be used for dishes that require bread crumbs or even for some Christmas desserts.

Here it is the recipe:

  1. Put all the ingredients in the order that is described;
  2. Choose the program 9 (in the case you have a Silvercrest bread maker - sometimes it's on sale at Lidl);
  3. In case you like it  more "brown" outside, choose the weight 1250g and the option for the darkest  color.

 Ingredients
  • 450 ml water
  • 1.5 teaspoon of olive oil
  • 600g of  "All purpose baking flour" from Bob's Red Mill
  • 1.5 teaspoon of salt
  • 1.5 teaspoon of Quick Yeast from Doves Farm
  • PS: Many recipes of gluten free bread include sugar. I have decided to not add it. Maybe it would improve the flavor, but in this case I preferred the healthiest version.
 Any suggestions to improve the recipe are more than welcome!! =D


Monday, 21 September 2015

Recipe | American Pancakes


In Portuguese

Hoje deixo-vos uma receita de Panquecas Americanas, super simples, super rápida e super deliciosa!!!

Vale a pena experimentar! :)

As fotos são escassas...adivinhem porquê?! =D


Ingredientes  
  •  1.5 copo de farinha Bob's Red Mill (1 to 1 baking flour)
  • 3 colheres de sobremesa de fermento
  • 1 pitada de sal
  • 1 colher de sopa de mel
  • 1 colher de sobremesa de extrato de baunilha
  • 1+1/4 copos de leite (usei leite sem lactose)
  • 1 ovo
  • 3 colheres de sopa de manteiga derretida 

Preparação 
  1.  Juntar primeiro os ingredientes secos (farinha, fermento, sal, açúcar e a baunilha);
  2. Adicionar o leite, o ovo e a manteiga derretida;
  3. Mexer bem até a mistura ficar homogénea;
  4. Adicionar um pouco da manteiga derretida numa frigideira;
  5. Com a ajuda de um cace (concha) colocar a massa na frigideira, virando sempre que necessário.
 PS: Podem acompanhar com aquilo que preferirem, neste caso usei Maple Syrup orgânico e frutos vermelhos. :)

In English 

Today I leave you with a recipe for American Pancakes, super simple, super fast and super delicious!!!

Definitely worth checking out! :)

I'm sorry that I don't have many pictures... guess why?! =D


 Ingredients
  •  1.5 cup of Bob's Red Mill 1 to 1 baking flour
  • dstspn of baking powder
  • 1 pinch of salt
  • 1 tblsp of honey
  • 1 dstspn vanilla extract
  • 1 + 1/4 cups of lactose free milk
  • 1 egg
  • 3 tblsp of melted butter

Method
  1.  Add first the dry ingredients (flour, baking powder, salt, sugar and vanilla); 
  2. Add the milk, the egg and the melted butter;
  3. Stir well until the mixture is homogeneous; 
  4. Add a little of the melted butter in a frying pan;
  5. With the help of a ladle put the dough in the pan, turning when necessary.

 PS: You can eat it with whatever you prefer. In this case I've added organic Maple Syrup from M&S with raspberries and blueberries. :)


Monday, 7 September 2015

Recipe | Spaghetti alla Carbonara

In Portuguese

Vamos aprender a fazer Carbonara? :))

Esta é uma das minhas comidas italianas favoritas e finalmente tive a oportunidade de aprender a receita original (é o que dá ter amigos italianos cá em casa - Grazie Tiziana!! =D )


Ingredientes 

Para duas pessoas:
  • 3 ovos médios (Gemas)
  • 200g de pancetta (bacon)
  • 160 - 200g esparguete
  • Queijo parmesão
  • Noz morcada
  • Pimenta preta (qb)
  • Sal (qb)

Preparação

1 - Molho
  1. Bater as gemas;
  2. Adicionar às gemas dos ovos o sal, a pimenta e uma pitada de noz moscada;
  3. Adicionar o queijo parmesão ralado até que a mistura fique com uma consistência intermédia (sem ser demasiado liquida ou grossa);
  4. Misturar os ingredientes até que o molho fique homogéneo e reservar.
2 - Massa
  1. Adicionar água e sal e deixar ferver;
  2. Adicionar a massa e deixar ferver durante 7-8 minutos
3 - Carne
  1.  Colocar a pancetta numa frigideira e levar ao fogão;
  2. Deixar fritar por uns minutos (neste caso depende do gosto pessoal - se gosta de uma textura mais crocante deverá deixar por mais tempo e vice versa).
4 - Misturar o esparguete com  o molho e, por fim, adicionar a pancetta. A gordura natural libertada pela pancetta irá "cozinhar" os ovos que fazem parte do molho, por isso deverá ser adicionada enquanto ainda estiver quente.


Et voilá...Buon Appetito!! :D


In English

 Let's learn how to prepare Carbonara? :))

This is one of my favorite Italian dishes and I finally had the chance to learn the original recipe (that's the result of having Italian friends in my home - Grazie Tiziana!! =D )

Ingredients

For two people:
  • 3 medium size eggs (Yolks)
  • 200g of pancetta
  • 160 - 200g spaghetti
  • Parmesan cheese
  • Nutmeg
  • Black pepper (as needed)
  • Salt (as needed)
Method

1 - Sauce
  1. Beat the yolks;
  2. Add the salt, the black pepper and a little bit of the nutmeg;
  3. Add the grated parmesan until the mixture gets and intermediate consistence (not too liquid or too thick);
  4. Mix all the ingredientes until the sauce looks more homogeneous.
2 - Pasta
  1. Add the salt to the water and boil it;
  2. Add the pasta and cook it for 7-8 minutes.
3 - Meat
  1. Put the pancetta in a sauce pan and leave it on the stove;
  2. Let it fry for few minutes (the time you fry it depends on your personal taste - if you like it more crunchy leave it for longer and vice versa).
4 - Mix the spaghetti with the sauce and, finally, add the pancetta. The natural fat released by the pancetta will "cook" the eggs that are part of the sauce, so it should be added while is still hot.


Et voilá...Buon Appetito!! :D


While preparing...

Beat the yolks and add black pepper and nutmeg


Add the parmesan


Mix the ingredients


Boil the pasta


Add the pancetta in the sauce pan


And let it  fry for a moment


Monday, 24 August 2015

Recipe | Yogurt Cake


In Portuguese

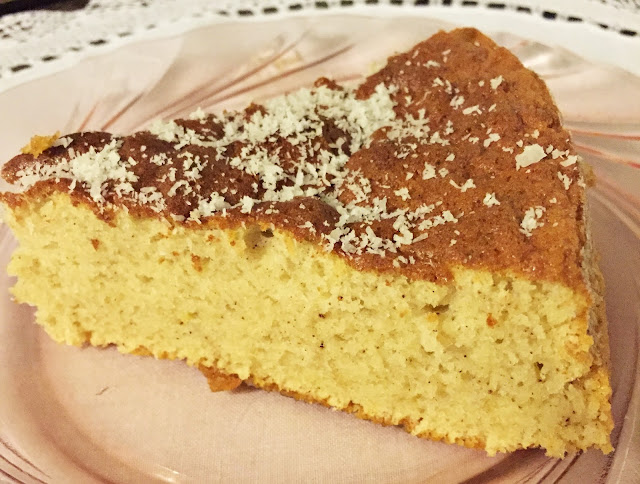
Desde sempre que um dos meus bolos favoritos é o Bolo de Iogurte

Ontem foi dia de experimentar novos ingredientes e o resultado não podia ter sido melhor! Trouxe comigo do Reino Unido algumas misturas de farinhas que comprei por lá. Os restantes ingredientes foram comprados cá por Portugal.

Dos melhores bolos de iogurte que já comi! Atrevo-me a dizer que não ficaria melhor com a tradicional farinha de trigo!!!

Desta vez o bolo teve um toque especial de Baunilha Crua de Madagáscar da Puro Sumo! :)

Ingredientes:
  • 1 iogurte de banana (mas pode usar qualquer sabor)
  • 3 medidas* de açúcar mal cheias
  • raspa de 1/2 limão
  • canela em pó -1 colher de sobremesa
  • 5 ovos médios
  • 1/2 medida* de óleo de girassol
  • 1/2 medida* de leite sem lactose
  • 3 medidas* de farinha (1 to 1 baking flour)  Bob's Red Mill
  • fermento em pó -1 colher de sobremesa)
  • baunilha crua Puro Sumo - 1 colher de sobremesa
  • côco ralado
* A medida corresponde ao copo do iogurte.

 Preparação:
  1. Colocar o açúcar juntamente com a canela, a baunilha, a raspa de limão e as gemas do ovos e mexer muito bem (segundo a minha mãe este é o segredo dos bolos - mexer muito bem estes primeiros ingredientes até começar a ver bolhinhas a formarem-se na massa);
  2. Adicionar o iogurte, o óleo e o leite e envolver até os ingredientes ficarem todos misturados;
  3. Bater as claras em castelo e adicionar;
  4. Por fim, adiciona-se a farinha e o fermento e mexer de novo até os ingredientes ficarem misturados de forma homogénea;
  5. Untar a forma com manteiga e polvilhar com farinha;
  6. Levar ao forno pré-aquecido a 180ºC por +/- 30 minutos (a duração depende dos fornos - vá sempre dando uma olhadela!! ;) )
  7. Enfeitar com côco ralado.

In English 

Since ever, one of my favorite cakes is the Yogurt Cake!

Yesterday was the day to try new ingredients and the result couldn't have been better! I have brought with me, from the UK, some flours mixtures. The remaining ingredients were purchased here in Portugal but you will be able to find equivalents in UK.

I must say that this cake is one of the best yogurt cakes I have ever eaten! I could also say that it wouldn't taste better using the traditional wheat flour!!!

This time, the cake had a special touch from the Madagascan Raw Vanilla from Puro Sumo! :)

Ingredients:
  • 1 banana yogurt (you can use any other flavor)
  • 3 measures* of sugar (not completely full)
  • zest from 1/2 lemon
  • 1 dstspn of cinnamon powder
  • 5 medium eggs
  • 1/2 measures* of sunflower oil
  • 1/2 measures* of lactose free milk
  • 3 measures* of gluten free flour (1 to 1 baking flour) Bob's Red Mill
  • 1 dstspn of baking powder
  • 1 dstspn of Madagascan Raw Vanilla Puro Sumo 
  • grated coconut
* The measure corresponds to the yogurt container.

Method:
  1. Add the sugar, then the cinnamon, vanilla, lemon zest and egg yolks and stir well (according to my mother, this is the secret of cakes - stir very well these first ingredients until you begin to see the formation of bubbles in the dough);
  2.  After mixing well, add the yogurt, sunflower oil and milk and mix it;
  3. Whisk the egg whites and add it;
  4. Finally, add the flour and baking powder and mix again until the ingredients become mixed homogeneously;
  5.  Grease the cake form with butter and sprinkle it with flour;
  6.  Add the dough into the cake form and put it into the preheated oven at 180ºC  for +/- 30 minutes (the duration depends on the ovens - always have a look!! ;) )
  7. Add the grated coconut on top of the cake.
     
Yogurt Cake


 Madagascan Raw Vanilla - Puro Sumo


The best mixture of baking flour that I've tried so far!!

 The Yogurt - Gluten Free (Isento de Glúten)


Sunday, 16 August 2015

Gluten Free in PORTUGAL | McDonald's

In Portuguese

Recentemente foi notícia que o McDonald's, em Portugal, através de uma colaboração com a Associação Portuguesa de Celíacos (APC), tem agora disponíveis menus isentos de glúten!

Segundo a APC, em Junho, foram iniciados os testes de pão isento de glúten (mas que contém ovo) em 12 restaurantes:
  1. Centro Comercial Colombo
  2. Restelo
  3. Gaia Drive
  4. Gaia Shopping
  5. Gaia Fojo
  6. Circunvalação
  7. Carregado
  8. Setúbal Drive
  9. Almada Fórum
  10. Rio Sul Shopping
  11. Birre
  12. Cascais Shopping
 E estão disponíveis 6 menus:
  1. Big Mac
  2. Double Cheeseburger
  3. McRoyal Deluxe
  4. McRoyal Cheese
  5. Cheeseburger
  6. Hamburger
A colaboração entre as duas instituições iniciou-se há quatro anos, em 2011, e durante este tempo foram estabelecidas técnicas de higiene e segurança de modo a permitir uma refeição isenta de glúten no McDonald's, incluíndo:
  • O pão isento de glúten vem embalado individualmente do fornecedor;
  • Esse pão é aquecido em bolsas de teflon, evitando assim contaminação cruzada;
  • Os funcionários terão de usar luvas próprias e descartáveis enquanto preparam a refeição.
Uma vez que ainda não experimentei nenhum dos menus isentos de gluten decidi perguntar a quem já o tinha feito e, regra geral, a experiência foi positiva!! :)

No entanto há pormenores a ter em atenção:
  1.  Pedir de forma clara que o menu deverá ser ISENTO DE GLUTEN;
  2. A comida deverá ser servida numa caixa que diz "PEDIDO ESPECIAL";
  3. É normal que a comida demore um pouco mais a chegar devido aos cuidados necessários na sua preparação de modo a evitar contaminação cruzada;
PS: Muito obrigada a todas as pessoas que contribuiram para este post dando a sua opinião.
Um obrigada especial à blogger Lipita, autora do blog "A rapariga do blog ao lado" por me autorizar a utilização das suas fotos!! Visitem o blog!! :)

Adaptado a partir de:
http://www.celiacos.org.pt/
https://www.mcdonalds.pt/mcdonalds/testes-cel%C3%ADacos/


In English 

Recently it was announced that McDonald's in Portugal, through a collaboration with  Associação Portuguesa de Celíacos (APC), the equivalent to Coeliac UK, has now available gluten free menus in some restaurants!

According to the APC, in June, the trials with gluten free bread (however it contains egg) were started in 12 restaurants in Portugal:
  1. Centro Comercial Colombo
  2. Restelo
  3. Gaia Drive
  4. Gaia Shopping
  5. Gaia Fojo
  6. Circunvalação
  7. Carregado
  8. Setúbal Drive
  9. Almada Fórum
  10. Rio Sul Shopping
  11. Birre
  12. Cascais Shopping
And there are available 6 menus:
  1. Big Mac
  2. Double Cheeseburger
  3. McRoyal Deluxe
  4. McRoyal Cheese
  5. Cheeseburger
  6. Hamburger
The collaboration between the two institutions began four years ago, in 2011, and during this time there were established hygiene and safety procedures in order to allow the preparation of a safe gluten free meal at McDonald's, including:
  •  The gluten free bread comes individually packed from the provider;
  •  This bread is heated in teflon bags, thus avoiding cross contamination; 
  • The staff uses specific and disposable gloves while preparing the meal. 
Since I haven't tried any of the gluten free menus, I decided to ask to people who had done it already and, in general, the experience was positive!! :)

However there are details that you need to pay be aware about:

  1. Ask clearly that the menu should be GLUTEN FREE (ISENTO DE GLUTEN);
  2.  The food should be served in a box that says "PEDIDO ESPECIAL", that means "SPECIAL REQUEST";
  3. It is normal that the food takes a little longer to arrive due to the fact that the staff needs to be extra careful preparing the meal in order to avoid cross contamination. 
And that's it! Hope you have a great time in Portugal and enjoy a delicious and safe meal in MacDonald's! :) 

PS: Thank you to everyone who contributed to this post giving their opinion. 
A special thank you to the blogger Lipita, author of the blog "A rapariga do blog ao lado" for allowing me to use her own pictures !! Visit the blog!! :) 

Adapted from:
http://www.celiacos.org.pt/
https://www.mcdonalds.pt/mcdonalds/testes-cel%C3%ADacos/


Gluten free menu in MacDonald's - Portugal
Pictures taken by Lipita! Thank you!! :)) 

Friday, 7 August 2015

The Allergy & Free From Show #3 | Hollows & Fentimans Ginger Beer

In Portuguese

Quem me conhece bem sabe que nunca fui apreciadora de cerveja. E portanto, após o diagnóstico de doença celíaca, saber que a cerveja era uma das bebidas proíbidas não foi qualquer drama.
Mas...qual não é o meu espanto que...descobri uma cerveja que gosto! (Os meus amigos vão ficar orgulhosos deste post! :P )

A caminhar pela exposição decidimos parar pela banca da cervejola. E eu naquela "hum...não gosto nada de cerveja..." ainda pensei bem em nem sequer experimentar! Mas já que era o dia "das provas" pensei depois "porque não?! Eu até gosto de desafios! :D "

E ainda bem que o desafio foi aceite!
Esta é uma cerveja de gengibre, feita apenas com ingredientes naturais, sem quaisquer sabores artificiais, muito refrescante!!

Se estiverem pelo Reino Unido pode sempre dar uma olhadela no website de modo a encontrar os locais onde a poderão comprar - Hollows and Fentimans Alcoholic Ginger Beer.


In English

Anyone who knows me knows that I have never been a fan of beer. And so, after the diagnosis of coeliac disease, knowing that beer was one of the prohibited drinks was no drama.
But...surprisingly...I have found a beer that I really like! (My friends will be proud of this post :P).

While walking through the exhibition we decided to stop by the beer's stall. And I was like "hum...I don´t really like beer..." I wouldn't not even try! But since it was the day of the "try out" I thought "why not ?! In fact I like challenges! :D"

And I'm happy that the challenge was accepted!
This is a ginger beer, made with only natural ingredients, without any artificial flavors, very refreshing!!

If you are in UK, you can search on the website in order to find the stockists, so you will be able to try it - Hollows and Fentimans Alcoholic Ginger Beer


 The Allergy and Free From Show


Thursday, 6 August 2015

The Allergy & Free From Show #2 | B - Tempted


In Portuguese

E aqui estou eu (novamente) de volta!! Desta vez com mais uma das marcas que mais me encantou no Allergy and Free From Show realizado em Londres no passado mês de Julho - B Tempted!

B-Tempted é uma marca londrina, que produz mini bolinhos de diversos sabores. Devo dizer que são deliciosos! Perfeitos para acompanhar um chá ou café. São frescos, suculentos e suaves! Depois de provar (quase todos) os sabores fiquei maravilhada com os de limão, chocolate branco e caju. Mas a surpresa maior foram os de chá verde moido e macadamia! Deliciosos!!!

Podem saber mais acerca da marca no seu website - B Tempted.


In English

And here I'm back (again)!! This time with more information about one of the brands that charmed me most in the Allergy and Free From Show held in London on last July - B Tempted!

B-Tempted is a brand from London that produces mini cakes with various flavors. I must say that they are delicious! Perfect for a tea or coffee. They are fresh, juicy and soft! After tasting (almost all) the flavors, I truly loved the lemon, white chocolate and cashew mini cakes. But the biggest surprise were the matcha green tea and macadamia nut ones! So, so delicious!!!

You can learn more about this brand on its website -  B Tempted.


The favorite of the favorites - Matcha Green Tea and Macadamia


The Allergy and Free From Show


The Allergy and Free From Show


Lemon,White Chocolate and Cashew


Matcha Gree Tea and Macadamia Nut


Saturday, 18 July 2015

Recipe | Garlic Bread

In Portuguese

 E finalmente aqui está a minha primeira receita! Super simples, super rápida, super deliciosa! Espero que gostem!! :)

Pão de Alho
Ingredientes:
  • Pão isento de glúten
  • 6 dentes de alho (depende da quantidade de pão - neste caso foi o que ulilizei para uma baguete de tamanho médio *)
  • 6 colheres de sopa de azeite extra virgem (*)
  • Queijo ralado
  • Oregãos
Preparação:

  1. Cortar o alhos em pedaços pequeninos;
  2. Adicionar o azeite;
  3. Levar ao fogão e deixar até o alho começar a alourar;
  4. Cortar o pão em fatias;
  5. Colocar a mistura de azeite e alho por cima do pão;
  6. Adicionar o queijo e, por fim, os oregãos;
  7. Levar ao forno a 180ºC por 15 minutos.
In English  

And finally here it is my first recipe! Super simple, super quick, super delicious! Hope you enjoy it!! :)

Garlic Bread
Ingredients:
  • Gluten free bread
  • 6 garlic cloves (this number depends on the amount of bread that you will be using - in this case I have used a medium size baguette *)
  • 6 soup spoons of extra virgin olive oil (*)
  • Grated cheese
  •  Oreganos
Method: 
  1. Cut the garlic into little pieces;
  2. Add the olive oil;
  3. Place it on the stove until the garlic starts getting a golden colour;
  4. Cut the bread;
  5. Place the mixture of olive oil and garlic on the bread;
  6. Add the grated cheese and, finally, the oreganos;
  7. Place it into the oven at 180ºC for 15 minutes. 


Preparation


Meal suggestion